How does a digital camera record an image?

Whether you own a film camera and a digital camera, they both essentially are light-tight boxes. There is a lens at one end that gathers the light and focuses it on a sensitive surface at the other end, thereby reproducing an image. In the past, film provided the sensitive material, and today in a digital camera, the sensitive surface is a sensor, most commonly a CCD or CMOS type, that has millions of tiny photosites arranged on it in a regular pattern known as the sensor array. All cameras have some way of controlling the amount of light coming in, either through a hole (the iris) that can be set to different sizes (the aperture), or by exposing the sensor for a specified period of time controlled by the shutter speed.

On the sensor, each photosite in the array is, in effect, tiny light meter that produces an electrical signal. The strength of the signal depends on the amount of light falling on the site. This makes it sensitive to brightness. To introduce color sensitivity, each site is covered with a red, green, or blue filter and thus responds to just one of the primary colors. In most digital cameras, these colored filters are arranged in what is called a Bayer pattern, which has two green-sensitive filters to every red or blue sensor (our eyes are most sensitive to green).

The electrical impulses from each photosite are digitized and processed by the camera to give a brightness and appropriate color that appears on screen as a “pixel”. The pixels make up the image file, which is written into the camera’s memory.

To get the clearest, most faithful color image on the screen, the camera software takes information from neighboring pixels and processes that, too. This is known as interpolation (see jargon buster). Things are not quite as simple as one photosite being equivalent to one pixel- although in better cameras the number of photosites and the number of pixels produced are roughly the same.

digital sensor, DSLR, basic photography, digital photography, Bayer filter, Photography foundation, understand digital photography
Bayer pettern in a Bayer pattern, there are twice as many green-sensitive cells as either red or blue. color-sensitive filters in this pattern are positioned above the sensor array, allowing just one of the three primary colors to pass onto the senso.


Jargon buster:
• Aperture – the hole in the lens through which the light passes, traditionally measured as a scale of f/numbers. (The bigger the number, the smaller the aperture.)

• Exposure – getting the right amount of light onto the sensor. Exposure is controlled by the speed of the shutter and the size of the lens aperture.

• Interpolation – the clever guesswork performed by the camera software for creating extra pixels by taking the brightness and color values from adjacent sensor cells.

• Photosite – an individual light-sensitive cell on the sensor.

Pixel–a single block of information from which a digital image is made.

• Sensor array – the collection of light-sensitive cells that generates the pixel. The sensor array is sensitive to variations in color and brightness.
All About Camera Light Meter

basic photography classes, intermediate photography classes, light meter, digital cameras, ISO, shutter speed, aperture, camera's internal meter, underexposure, overexposure, metering modes, Essential Foundation, Center-weighted mode, Spot metering mode, midtone, Matrix metering, Evaluative, Multi, Pattern, viewfinder, meter sensor, reads light

One of the most asked questions from students in both basic photography classes or intermediate classes is definitely, “What is light meter and how does it work?”. Well, regardless which digital cameras you have they all have a light meter built into them that reads the light level in a scene and it assesses the combination of ISO, shutter speed and aperture required to get the “right” result. Provided nothing in the scene is way too bright or dark, a camera’s internal meter works well, most of the time.

Problems may arise, however, when there are bright lights that create highlights or reflections, or the sun is in the scene. At the other end of the brightness scale dark shadows or low light may also pose a challenge. In situations such as these, the meter can be fooled. If you include too much bright snow in the scene, for example, the meter may determine that the whole scene is bright: consequently it tries to underexposure , and the result is too dark. Conversely, take a photograph in a shady place and the camera tries to overexposure because this time there is not enough light.

Camera designers have been ingenious in finding techniques to deal with these issues. that have provided metering modes, a solution where the camera doesn’t measure light equally from across the scene. The different modes are a big topic in our Basic Photography  Course (Essential Foundation) and are also describe below.

However, it is an advantage with a digital camera to record a photo to look at the LCD screen to see if the result is up to one’s liking. Take the picture again by altering the exposure: If it’s too dark on the screen, increase the exposure (move the indicator to the plus(+) side): if it’s too light, decrease the exposure (move the indicator to the minus(-) side).

Center-weighted mode– the meter sensor takes most of the reading from the center of the scene.

Spot metering mode– it takes a reading from a small area: You choose the part that is a midtone, take an exposure and apply this value for the whole scene.

Matrix metering– in some cameras it’s called Evaluative, Multi, Pattern, depending on the brand of the cameras. The viewfinder is divided into a number of different segments and the meter sensor reads light from each one (the more segments it has, the more advanced it performs). The readings are compared with combinations programmed into the camera’s memory. Most scenes can be accurately evaluated, apart from impossibly bright highlights or the proverbial black in a coal cellar.

What are file format?

beginner photography, digital images, file formats, memory card, image-processing program, camera owner, What are JPEG, RAW, TIFF, DNG, RAW files, computer's hard drive, camera manufacturers, Canon camera, Nikon, Sony, Fujifilm, software program, RAW converter, readable image-file, photo-realistic pictures, resolutions for JPEG, ”lossy" compression, low-compression, memory card, universal RAW format, Adobe imaging products, Joint Photographic Experts Group, Tagged Image File, pure data file, Digital Negative

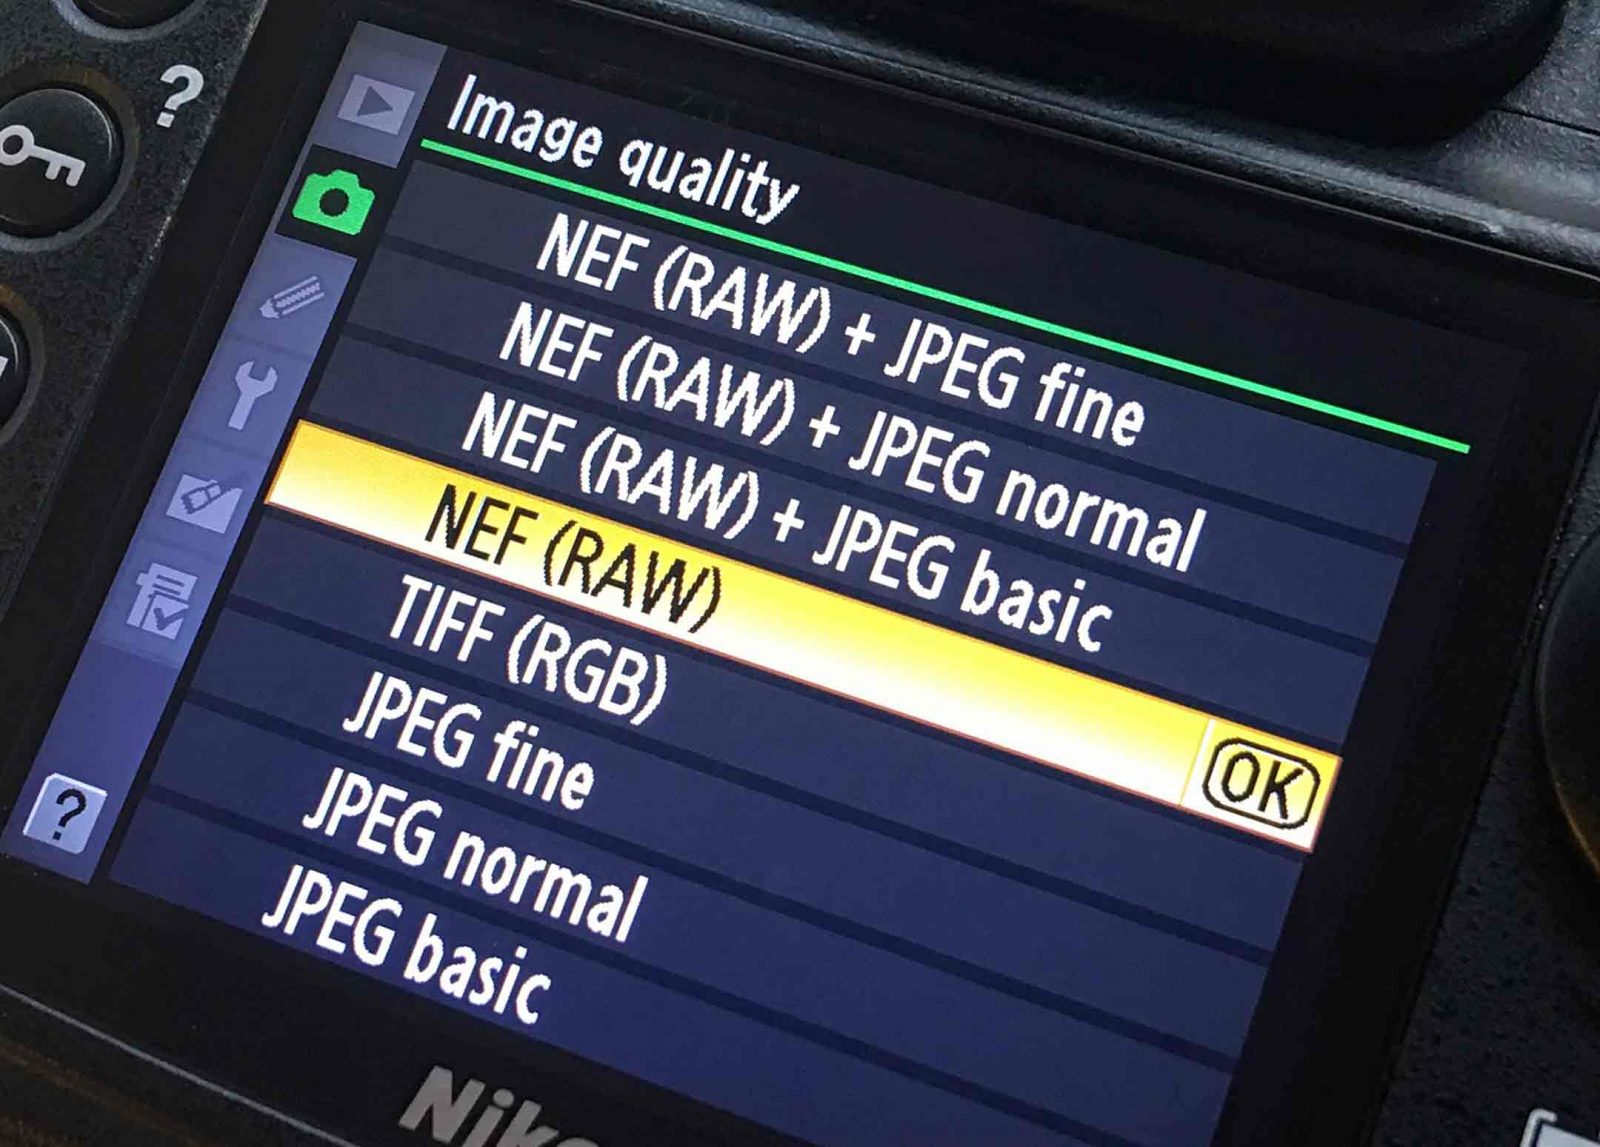
Digital images are recorded and stored in different forms known as file formats that have evolved because the images can be used for different purposes. It takes a lot of memory to store data, so some formats compress the images in order to fit more pictures on a memory card or in your computer. Cameras can often record using more than one file format. Despite which formats your camera uses, you can usually convert to any of the others described here when working with an image-processing program in the computer.

If you are a new beginner in photography and just got yourself a new camera you will find yourself asking one of these questions, “What are JPEG, RAW, TIFF and DNG? Which file format should I use? How difference are they?”. Today your question will be answered.

RAW files are large, they include all the data from the sensor and consequently take up a lot of space on your computer’s hard drive. In addition, these files are proprietary to camera manufacturers(and in fact, to each model they produce- except for a RAW format called DNG). That means the specifications for RAW files recorded using a Canon camera are different than those recorded by a Nikon, all of which are different than those recorded by a Sony, Fujifilm, or camera from other companies. You need a software program known as a RAW converter to read these files in your computer. However, once that is done you can convert them to TIFFs or JPEGs for display or to make prints.

JPEG is universally readable image-file format that can display up to 16.7 million colors, the number needed for photo-realistic pictures. You can usually set the camera to a number of different resolutions for JPEG. This format uses “lossy” compression, which means that data is discarded every time you open and re-save a file. To get around this, download JPEGs into your computer and open as a duplicate when using your image-processing program; that way you can go back to the original image if anything goes wrong.

TIFFs also handle 16.7 million colors and do so without the data loss found in JPEGs, but TIFFs consequently take up a lot more memory. Not all cameras use TIFF for recording, and in practice you see little, if any, different between large, low-compression(fine quality) JPEG files and TIFF files, but you can fit six or seven times more JPEGs on a memory card.

DNG is a universal RAW format, meaning non-proprietary, introduced by Adobe who supplies a free, regularly updated converter for all RAW formats as a download. Most major camera manufacturers still prefer their own versions of RAW, but DNG is an excellent option, especially if you use multiple cameras. Since it is a RAW format, no data is lost in conversation, and it functions seamlessly with Adobe imaging products while still allowing you to embed the original RAW file, so that is not lost to you either.

Here are what the abbreviation stand for.

JPEG- Joint Photographic Experts Group
TIFF- Tagged Image File
RAW- a pure data file
DNG- Digital Negative (a RAW format)